
• 8/26/21 7:48 pm
- 134.9k views • 64 today
- 12
- 9

62
BIG REVAMP
Version 0.10.0 of PlanBuild comes with a big internal code refactor and many changes to the handling of plans and blueprints. Please make sure to check out the documentation. The biggest changes in a nutshell:
- Instead of switching plan and blueprint mode on the rune, you now have two distinct tools, the Plan Hammer and the Blueprint Rune.
- All of the blueprinting is done via the Selection tools. You can add and remove parts of your buildings to a selection and need to use the Edit Selection tool or the selection.gui console command to save or copy your blueprint.
- The configuration was redesigned for more clarity. Please revise your configuration once after installing this version.
PlanBuild installation and basic usage
PlanBuild is a Valheim mod similar to BuildShare with additional terraforming features, GUI components and immersive additions. Follow this instructions if you want to install and use PlanBuild to share your creations on Valheimians. For a more in-depth overview of the features of PlanBuild check out this article about the mod.
Using a mod manager
The simplest way to install the mod and its dependencies is to use a mod manager. All required files are hosted on Thunderstore, so you can use either ThunderstoreModManager or r2modman for downloading and installing the mods. Usage should be self-explanatory, but there is online help available for each of the managers, too.
These four mods are required for PlanBuild to function:
After installing everything via the mod manager, you can proceed with the Start Valheim part of this tutorial.
Manual install
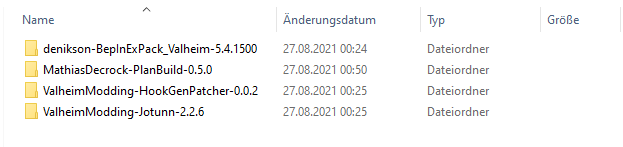
If you would like to install everything manually, follow the instructions provided. Download all of the zip files of the mods from the previous step manually and extract them into a separate directory. It should look like this when finished:
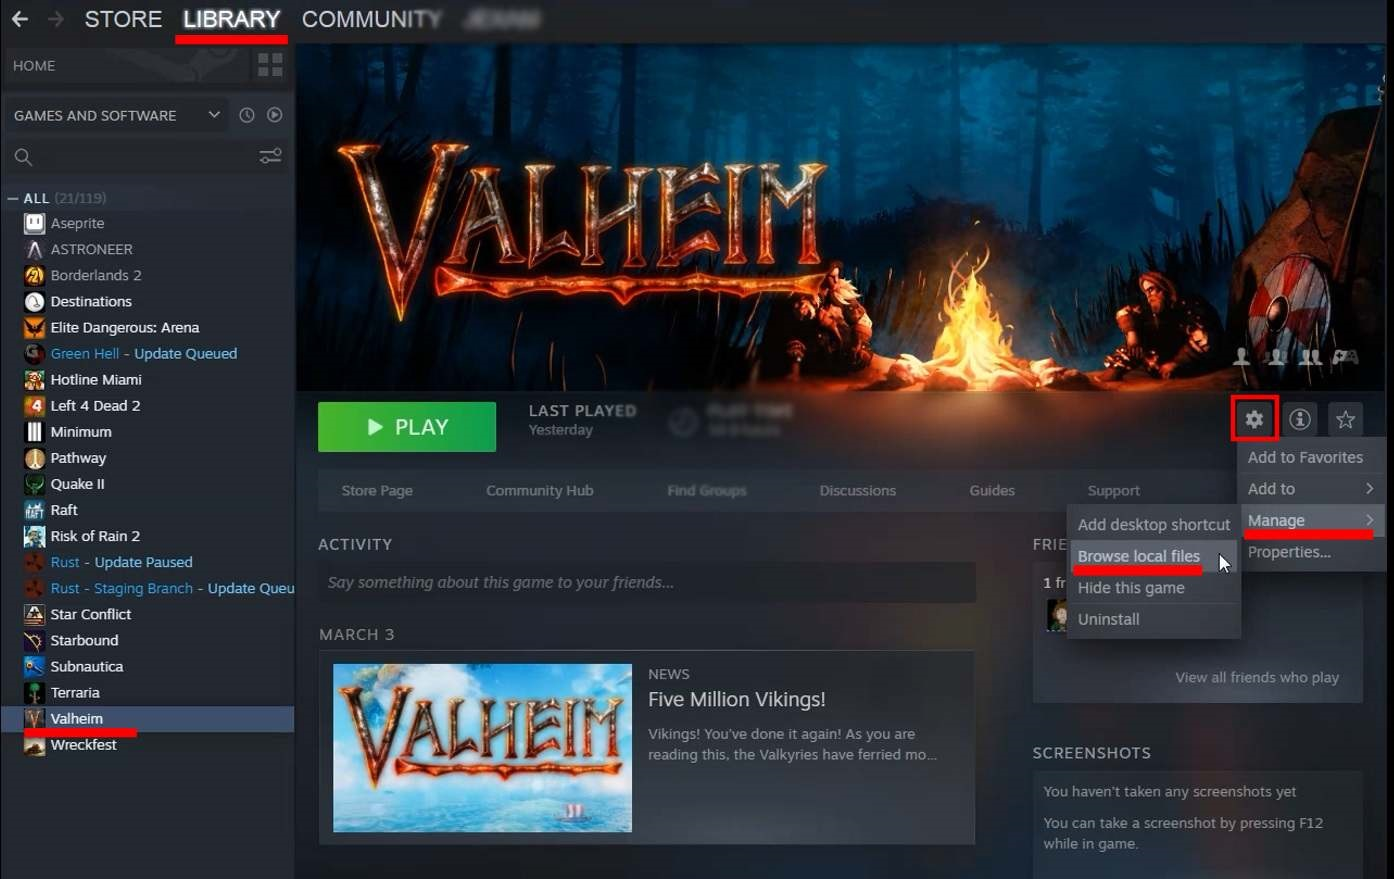
Open your Valheim installation folder
Browse to your Valheim's local file. Boot up Steam. Go to your Library, then select Valheim. To the way right, below the Valheim banner you will see a gear. Click the gear then Manage>Browse Local Files. This will pop up a window and show you where your Valheim folder is.
Copy the BepInExPack
Inside the extracted BepInExPack folder is another folder "BepInExPack_Valheim". Copy all files included in there into your Valheim install folder. Your game folder should look like this now:
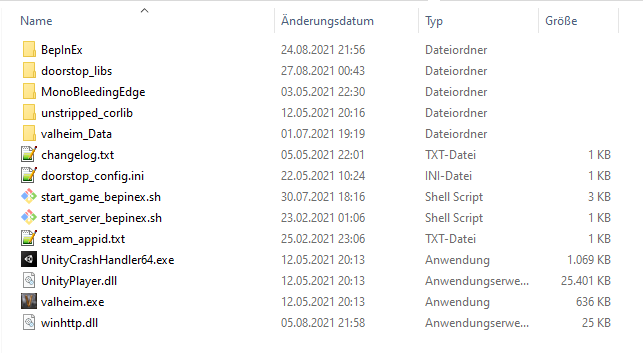
Browse inside the newly created folder "BepInEx" in your Valheim installation folder:
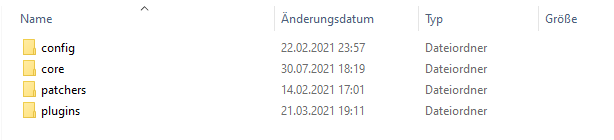
Copy HookGenPatcher, Jötunn and PlanBuild files
Copy all folders you find inside your extracted mod files inside the BepInEx folder of your Valheim installation. The folders are named "config", "patchers" and "plugins" inside the extracted files as well as in the game folder. All files in these folders need to be in their respective counterparts inside the "BepInEx" folder of your game install for the mod to function.
Start Valheim
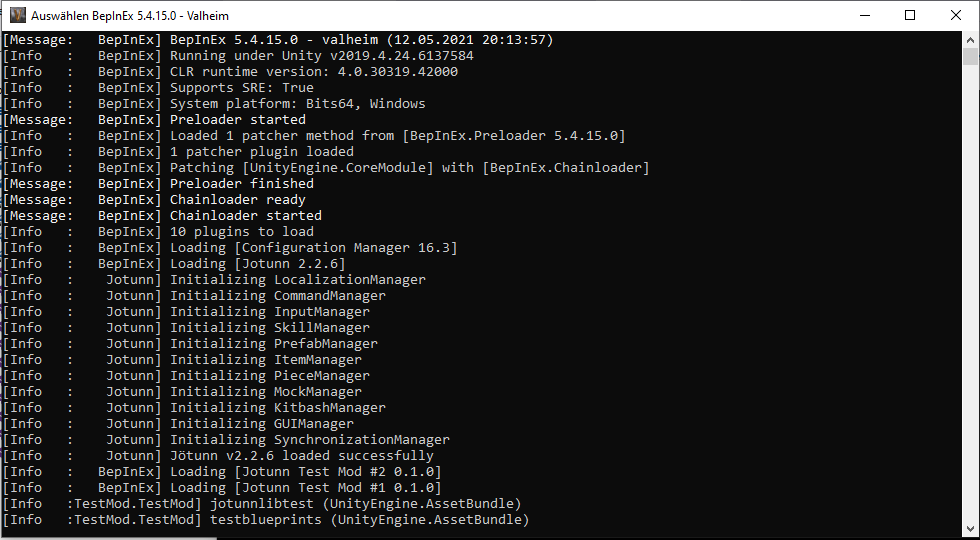
When everything was installed correctly, you can start Valheim and will see a console window popping up with some text running while starting the game. This means BepInEx is loaded correctly and you successfully installed the mods to the game.
Crafting the BlueprintRune
Unlike BuildShare, PlanBuild uses an actual in-game item to access the functionality of the mod. After picking up your first stone with a new character you will learn the recipe for the BlueprintRune. If you use an existing character you likely will learn the recipe immediately after loading a world. The item can be crafted inside the Player's crafting menu. No crafting station is needed.

Using the rune to create a blueprint
After equipping the rune the first time, it is still in "planning mode". See the in-depth article about the PlanBuild mod to learn about its other functionalities. Press P on your keyboard to switch to the "blueprint mode" of the rune. Open the build menu and you will see a "Tools" section with various tools to select from.

The first tool is used to create blueprints. You will see a circle shaped selection marker in the world. Everything inside this marker will be saved into the blueprint. To have a visual clue on what will be captured by the rune, press and hold Ctrl on your keyboard. Pieces that will be captured will be displayed in green color. When you are happy with the selection, click the left mouse button to capture all pieces. A dialogue will appear where you can name your blueprint to whatever you like.

Building your blueprints
After you captured your first blueprint (or if you already had BuildShare files in your game folder) you should see an icon for every blueprint inside the "Blueprints" tab of the build menu of the rune:

Select a blueprint and you should see the structure as a "ghost piece" just like when building "normal" pieces of the game. You can also rotate the structures like you would do normally. When you are satisfied with the positioning, press the left mouse button to place your blueprint.
Per default PlanBuild will place a "planned" version of the blueprint. This means you have to gather all resources and finish building the structure manually. You can activate a configuration setting that allows you to build blueprints with "normal" pieces. That setting is turned off per default. To activate direct build, press Esc and click on Mod Settings. The mod settings window is provided by Jötunn and has the settings for all mods using Jötunn. Click on the PlanBuild section and scroll down to activate the setting:

Finding your blueprints
The blueprint files of your captured structures can be found in your Valheim installation folder under BepInEx/config/PlanBuild/blueprints:

This is also the place where you can copy your downloaded .blueprint or .vbuild files to when you want to use them in the game. The mod also looks for files in the BuildShare path, so you don't need to copy previous BuildShare files to this new location to use them.
Further reading
PlanBuild offers a lot more tools and settings for you to explore. Read all about it on the in-depth article about PlanBuild.
More like this
 How to Save Your Building and Share it on Valheimians using PlanBuild ModTutorial Article
 JP Valheim
•6/17/23 9:04
9kx 11
JP Valheim
•6/17/23 9:04
9kx 11 How to Download and Save Buildings Using PlanBuildTutorial ArticleJP Valheim
•3/17/23 9:04
8.5kx 152
How to Download and Save Buildings Using PlanBuildTutorial ArticleJP Valheim
•3/17/23 9:04
8.5kx 152 Full Guide to Using and Installing the PlanBuild & Infinity Hammer Mods + Their DependenciesTutorial ArticleJP Valheim
•4/14/23 2:22
7.6k 2x 134
Full Guide to Using and Installing the PlanBuild & Infinity Hammer Mods + Their DependenciesTutorial ArticleJP Valheim
•4/14/23 2:22
7.6k 2x 134 How to Download and Install Valheim Texture PacksTutorial Article
 Valheimians
•3/5/21 12:01
6.7kx 13
Valheimians
•3/5/21 12:01
6.7kx 13
455
6


 Lou De Witte
 SharpWolfclaw
 Isepic
 PUP
PUP
 Fluffy-n-Dana

Have something to say?