
- 56,712 views • 12 today
- 7
- 1
- 13

45
Buildshare Tutorial | How to Save and Import Valheim Builds
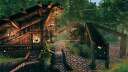
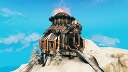
In such a short time, the Valheim Community has blown up and many have created some rather cool and unique Valheim Builds. Up until about a month ago, builders alike could share only screenshots of their builds. Now, thanks to CR and PJNinja, we can share not only photos, but downloadable files as well with a mod they created called BuildShare.
Buildshare allows you to save and load your (and others) constructions by introducing the new file type ".vbuild". BuildShare has several other features which we will cover in a different tutorial. For now, let's learn how to use the Save and Load features!
NOTE: The latest version of InSlimVML w BepInEx bug fix contains BuildShare, so skip down to "Download and Install InSlimVML" and use this download instead of the one linked in the steps below. However, a lot of people are having issues with the latest version, so it is suggested to download the previous version of InSlimVML (linked below) and follow the steps exactly as written.
Download and Install BuildShare
First, you'll want to download the BuildShare Mod from Nexus Mods. We downloaded ours to our desktop.Note: We're using Google Chrome. Depending on your web browser, your download options might be slightly different. Ex: Firefox downloads appear in the top right of the browser. You'll see the following icon: ↓. Click the arrow and then the folder icon next to the zip folder you just downloaded. That will bring you to where your zip file is.
Download and Install InSlimVML
Now, download InSlimVML from Nexus Mods. The process for this is the same as above.InSLim is a Mod Loader for Unity-Develeped games and has been specifically made to cater to Valheim on Steam. InSlim allows user-generated . dlls to be loaded with Valheim, enabling code tweaking without distributing Valheim code.
Navigate to your Desktop (or wherever you downloaded your files to) and find INSlimVML. Right click and hit "Extract All". A window will pop up where you'll be able to choose the location of your files. We're selecting Desktop for ease of access.
A window will pop up showing you your extracted file (if not, navigate to where you extracted your file). Open up InSlim-023 and select all of the file in this folder by clicking on the first file + press and hold shift + click on the last file. Right click and select copy.
Install InSlimVML in Valheim
Browse to your Valheim's local file. Boot up Steam. Go to your Library, then select Valheim. To the way right, below the Valheim banner you will see a gear. Click the gear then Manage>Browse Local Files. This will pop up a window and show you where your Valheim folder is.
Right click and hit "Paste" to paste the InSlimVML files. Some windows will pop up asking if you want to merge folders. Select "Yes". Another window will ask you if you want to Copy and Replace files with the same name. Select "Yes" for all of these as well.
Keep this window open for the next step.
Navigate back to your Desktop (or wherever you saved the BuildShare mod folder) and right click "Extract All". A window will pop up showing you your extracted file (if not, navigate to where you extracted your file).
Go back to the window you kept open (your Valheim local files). Open the folder "InSlimVML" and then "Mods". Drag and drop your CR-BuildShare_VML.dll file to this Mods folder (or right click "copy" and paste").
Note: after the latest Valheim Update, some people are having issues with InSlimVML. Please check out these troubleshooting tips if you are.
Saving your Builds
Boot up Valheim! If you want to save one of your builds, be sure to load your world that you've built something in. When you enter your world, you will see a transparent "BuildShare" tab on the left hand side of the screen.
| Walk over to the construction you want to save (get pretty close to it). Hit "Esc" or tab to interact with BuildShare. Click on the BuildShare tab. A panel will pop out with several options. Select Toggle-Radius. Toggle-Radius allows you to preview what will be copied based off the radius you give it. For bigger builds, you'll need a bigger a radius, etc. |  |
Be sure the button below the Radius box says Displaying: True. This will highlight your build in blue and show you if you need a bigger or smaller radius. When you change your radius number, click the Displaying button twice as shown in the video below to update your build preview.
Make sure nothing around you is highlighted blue that you don't want copied. In the video below, I'm checking to make sure the entire structure is selected. The very top of it isn't, so I'm adjusting the radius.
Select Save in the BuildShare Menu. Click the button "CURRENT" below Set Save Point.
The orientation you're facing will be the orientation the build is saved.
Note: If you are saving multiple constructions, you want to make sure when you're saving, the radius is the same as the toggle-radius number. BuildShare keeps all of your prior saves information.
Give your build a name in the Build Name field and then hit "Save". Your build will no longer be blue.
To verify your build saved correctly, select My-Directory. A window will pop up. This is where your .vbuilds save to. Right click and hit "Properties" and make sure your file has size. If your file does not have size, delete the file and try again.
Importing Builds
Download a build either from here or Nexus Mods. If the file is zipped, unzip it. Place the .vbuild file into your BuildShare>Build directory. The best way to find this directory is through Valheim where you can access "My-Directory" through BuildShare.
Travel to the spot you want the build to go. Hit "esc" and click Build on the BuildShare menu. Under Build Name, you can select the build file you want to import into your world. DO NOT PRESS BUILD. Click on the TOGGLE Button so you can first see where your build is positioned (your build will appear green).
Once you've found the desired position, do not move. I've already messed around and found out where this Build will settle best. Click Build!
Watch video below for the complete process.
| You can change the positioning of your build by changing the X, Y, and Z Offset numbers as well as the Y Orbit. Click "Update POS" each time you change these numbers to update the build preview. Start with smaller numbers when adjusting the positioning. Alternatively, you can move your Viking to a different spot effectively changing the location of the build. Toggle "UPDATE POS" whenever you've moved your location to update the preview. |  |
Questions? Comments? Let us know below!
BuildShare Discord Support:[url='[style b=false i=false size=16px color=" var(--text-link)"]discord.gg/Eb7sFEeGfU[/style]']https://discord.gg/Eb7sFEeGfU[/url]
| Tags |
1 Update Logs
Update #1 : by Valheimians 04/29/2021 9:17:44 amApril 29, 2021 @ 1:17 pm UTC
Added an important note about the latest version of InSlimVML with BepinEX plugin. Refer to first NOTE in the intro for more information.
9
6


 Franco Petrielli
 SharpWolfclaw
 Big
Big

 Isepic


 dmassimiani
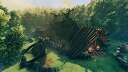


Have something to say?
Unfortunately it's not working for me, the game crashes ;-;Valheimians: You should do, too :P If you want, I can also write a tutorial or something like this article here...
I am a user who plays Balheim in Korea.
You've helped me a lot. Thank you. :)
The Save function take anything that you've placed in a radius, if you select 1000000, you can, but your computer will freeze and crash if exceed your memory, all depends of your specs.
Have a greet day !